Snapping Mesh Nodes to Arcs
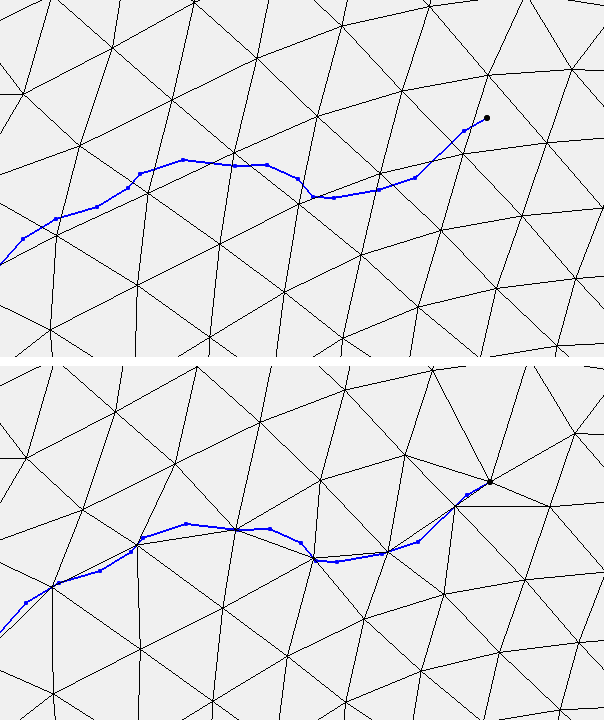
By aquaveo on September 18, 2019After generating a mesh, you might notice that not all of the nodes line up along key features. There are a few ways to resolve this, but SMS 13.0 introduces a new method: the Snap Mesh to Arcs command.
In order to use the Snap Mesh to Arcs command, you must have the following:
- 2D Mesh
- Map coverage
Once you have the needed components, snap the nodes to an arc by doing the following:
- On the map coverage, draw an arc or arcs where you want to move the mesh nodes.
- Select the desired arcs.
- Make certain the correct map coverage and mesh are active in the Project Explorer.
- Right-click on the map coverage in the Project Explorer and select Snap Mesh to Arcs.
- Specify a tolerance value in the Snap Mesh to Arcs dialog.

The command aligns the nodes in the mesh to the selected arcs in the map coverage. If no arcs are selected, this command will move nodes for all arcs in the coverage, so be certain to either select the correct arcs or make certain there are no extra arcs on the coverage.
When using the tool, it will only work with the active mesh and the active map coverage. Be certain that the correct mesh and map coverage are active in the Project Explorer.
It should be noted that not all nodes will be snapped to the selected arc. Any node that could cause instability, if moved, in the mesh will not be moved. Furthermore, nodes outside of the tolerance value will not be moved. When the nodes have been moved they cannot be moved back, therefore it might be a good idea to first use the tool on a duplicate of the target mesh then, if the results are good, rerun the tool on the target mesh.
The Snap Mesh to Arcs tool can be a useful addition to your mesh editing tools. Try it out in SMS today!


